Thanks for signing up to the NEST SEO Bootcamp. Over the next three months I’m going to teach you how to boost your ranking in Google and get more students from your website.
BASICS:
What is SEO?
SEO is the practice of trying to get your website to rank higher in Search Engine results. You can sometimes pay to appear at the top of Google, but the most traffic will come if you get their organically. This is the goal of SEO.
This might sound a little obvious, but I want to start at the very beginning so we’re all on the same page (the first page!) about SEO.
Why is it important to me?
If you put a website out there, it doesn’t matter how nice it looks and how well it works if no one can see it. These days, a lot of traffic comes from social media, but for most sites the biggest source of traffic is search engines and – lets face it – we’re mostly talking about Google here.
Search Engine Optimisation covers all the tips and tricks you can use to have your website appear as close to the top as Google as possible. If you run a kickboxing school in Nottingham, and someone Googles ‘Kickboxing in Nottingham’ its obviously a huge competitive advantage to have your school at the number one stop.
How can NEST help?
Now, having the top spot on Google is something everyone in your area is going to want, and to get there and stay there it will take a lot of time and work, and we can’t promise we’ll be able to get you that converted top-spot for your Martial Arts style and area. What we’re looking to do is raise your ranking a few places to get you more website visitors, more lesson booking and – ultimately – more students.
One of the key ranking factors of SEO is unique content so we can’t provide you with templates to copy and paste like we do with the Summer or Back-to-School artwork, you will need to create content that’s unique to your school and your business. Every week for the next 3 months we’ll give you three or four things you can do to boost your site. This guide will be most relevant and useful to you if you use a NEST myMA website, or at least a WordPress site, but lots of it will be applicable to any website.
If you follow our weekly guide you should see a increase in traffic in the next few months, and once the Bootcamp is finished you’ll have the skills to keep your site updated and keep growing traffic.
THINGS TO DO THIS WEEK
1 – RUN A SEO TEST
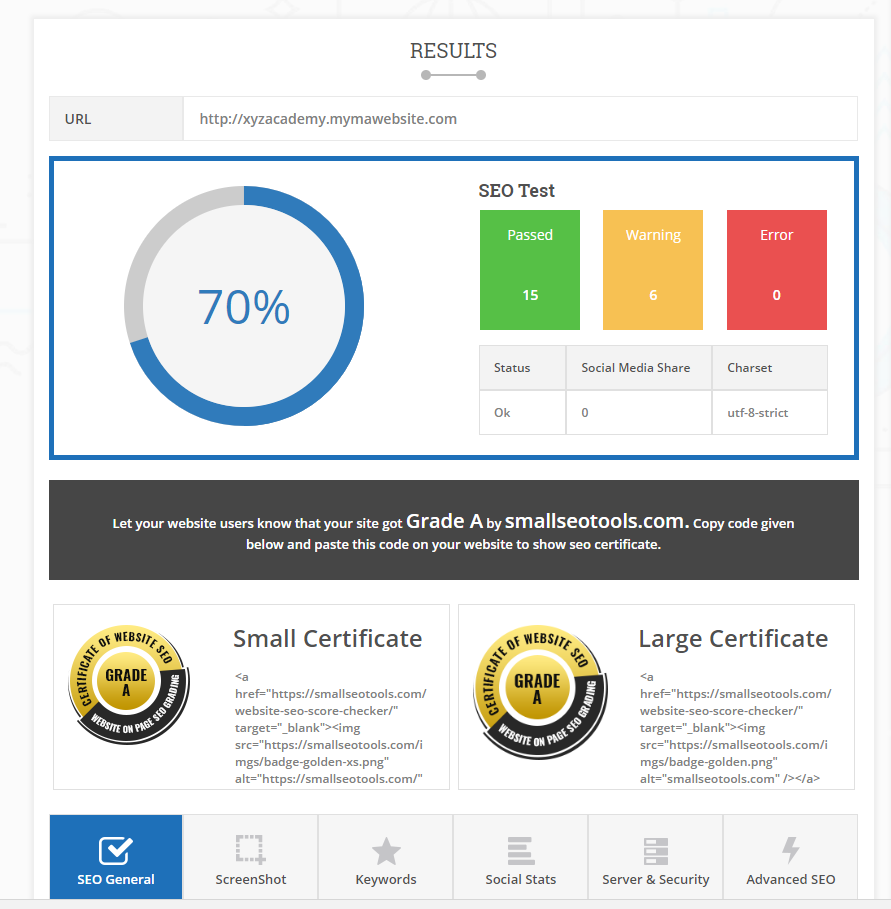
There are loads of websites out there that let you gauge how well your site is currently preforming. They all use different metrics and weight different ranking factors higher or lower, so you should always take the results with a pinch of salt. A good tool to use is https://smallseotools.com/website-seo-score-checker/ – smallseotools provide a lot of SEO tools, and it’s a useful site to bookmark. For now, if you copy and paste the URL of your website and press enter. We ran our XYZ Academy demo page, and got a score of 70% – not bad! Make a note of the score you get, hopefully over the next few months you’ll see that score rise.
If you scroll down on the seo-score-checker page you’ll where your site passes and fails a basic SEO Test. You’re never going to pass every single test, and some of the ranking factors are out of your control. If you or your web developer see anything you can fix, that’s obviously the right thing to do, but don’t worry if it all looks like meaningless jargon to you. Over the coming weeks we’ll show you how to fix some of these issues. The important thing at this stage is to make a note of the score to we can see any improvements over the coming weeks.
2 – LINK YOUR SOCIAL MEDIA ACCOUNTS TO YOUR WEBSITE
Because Social Media is so important, search engines prefer it if they can tie in your social accounts to your webpage, so if you have a Facebook, Twitter and YouTube etc. you need to embed links to your social accounts within your website.
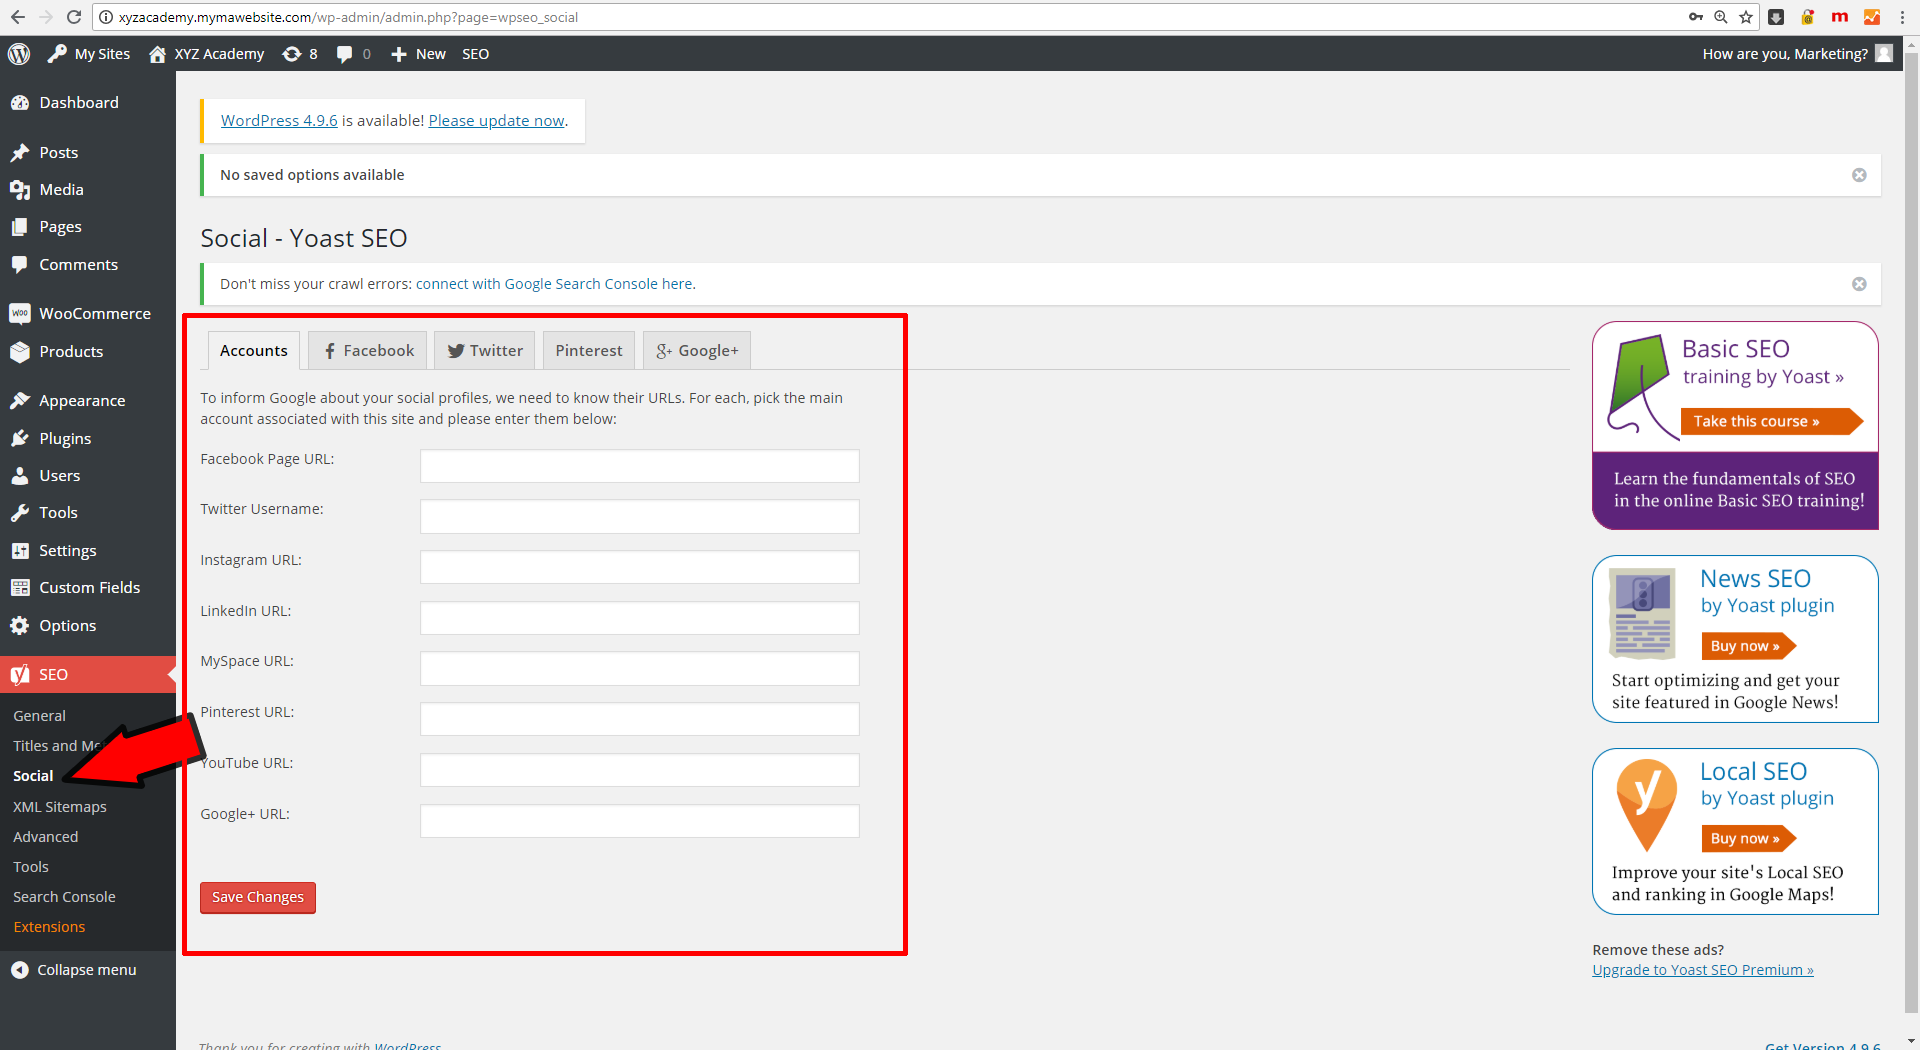
If you have a myMA website, or any other WordPress site that uses the Yoast SEO Plug-in (we’ll go into Yoast in more detail later) this is simple to do. Navigate to SEO in your left-hand menu, click SOCIAL and fill in all the links.

This will embed your Social profiles into every single page of your website. They wont be visible to visitors, but this gives some continuity to your online presence, and it binds all your accounts and content together, which is a ranking factor for Google.
If you look at that page you’ll see a few tabs – Accounts / Facebook / Twitter / Pintrest.
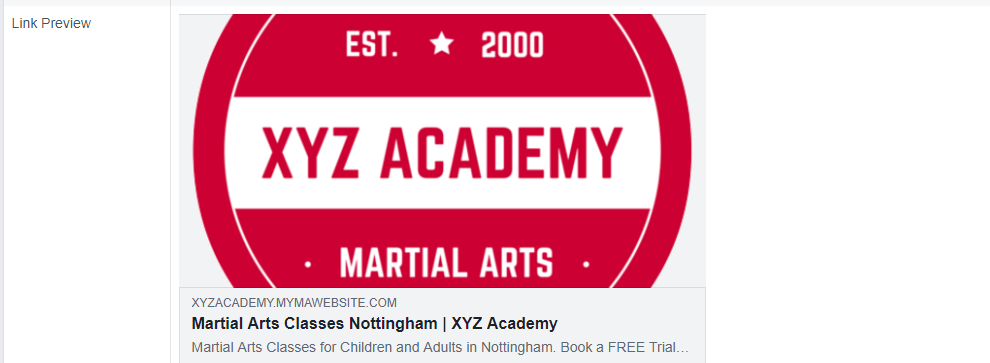
One of the useful features here is on the Facebook tab, so if you click on that you’ll see there’s an option to upload a default image for Facebook sharing. When someone shares a page to Facebook, Facebook automatically generates an image for the pages that’s being shared that’s based of the content. If it can’t find an image, it will be left blank which reduces the chances of it being clicked and shared again. So, what you can do is upload a default image that will show if no relevant image is found. Here’s what will pop up if you share http://xyzacademy.mymawebsite.com on Facebook:
So, create an image that’s quite general and reflects your school. If you don’t have Photoshop, you can use the free browser based image editor https://pixlr.com/editor/ to create your image.
Create an image that’s 1200 x 630 pixels for the best display on high resolution devices, save it and upload it to your myMA site as a default image for Facebook sharing.
You can preview how any page will be viewed on Facebook by copy and pasting any page URL into the Sharing Debugger here: https://developers.facebook.com/tools/debug/sharing/ and clicking ‘Debug’. So if you write a blog, and want to preview how it looks before you share it you can copy www.example.com/blog/mypost into the Facebook Developers section and preview how it looks
While we’re discussing Social links, if you haven’t already added visible links to your myMA homepage, now is a good time to do so. Navigate to Options on your lefthand menu, scroll down to where it says ‘Facebook Page URL’ etc and add all the relevant details. This will add social links to your homepage with the relevant icons.
3 – SUBMIT YOUR BUSINESS TO “GOOGLE MY BUSINESS”
If you Google ‘NEST Management’ on a desktop, you’ll see on the righthand size we have information about our Address and opening times and some images.
All this info helps Google identify you, so if you have a full time location, you can set this up for your Academy and manage this information easily here: https://www.google.com/business/
Sign up with a free account and follow the steps to add your business. If you manage multiple locations,there’s a section to add new locations as well as adding images.
You’ll need to be on top of keeping your opening times updated. When people use Google Maps to navigate to your location, they’ll be told about opening times etc so it’s important this is correct. Add some photos and talk to your students about adding Google reviews. In fact, Google uses a lot of this information to improve their search results, so try and update as much as you are able.
Week One Wrap Up
That’s it for week one! Next week we’ll show you how to set up Google Analytics, walk you through a good blog post and show you how to make sure your homepage (the most important page on your site) is up to date and tagged correctly for SEO.


